A Simple Indoor System: DIY Grow Light Shelves for Seedlings
Homegrown vegetables are amazing, but sometimes the growing season doesn’t allow it. That’s when you need to start seeds indoors. Here are some DIY grow light shelves for you to make for starting your own seeds.

This post contains affiliate links, which means I make a small commission at no extra cost to you. See my full disclosure here.
In order to get a jump start on your gardening season, seed starting is necessary. However, starting seeds with just a sunny window doesn’t exactly work the greatest to get healthy plants. Seedlings need more light than that, up to 12 to 16 hours of light a day. Indoor seed starting also provides a higher germination rate than outdoor because you can control things like moisture, temperature, and light. I’m going to show you the easiest way to make diy grow light shelves which is a much better option (aka a better deal) than buying something like a three-shelf unit for indoor gardening.
Don’t forget to have a garden plan in place before you start your own seedlings. Nothing is worse than not having enough garden seedlings to feed your family for an entire year!
Grow Lights
First, we need to understand the difference between grow lights and a traditional light source. Grow lights mimic the light spectrum of the sun, meaning that they release certain wavelengths of light. Different plants need different wavelengths. Red light encourages root formation, flowering, and bloom. Blue light encourages foliage and photosynthesis. Grow lights will offer the full-spectrum light as well as use less energy and don’t put off much heat, which would burn your plants.
Supplies Needed
- shelving unit – wire shelves work best but aren’t completely necessary
- grow lights – make sure they are the same width as your shelving unit as different sizes are available
- chains – most grow lights come with these chains but not all so check
- eye hooks – this is just for the top shelf so if you want to skip buying these it’s an option
- power strip
For a shelving unit, I just went to Lowes and got a 5 stand wire shelving rack that I could use for multi-purposes. I needed enough space to grow healthy seedlings for my large garden. Every year, I take things off of it to start seeds and after moving my seedlings outdoors, I just put things back on. However, I have decided to try something new in the upcoming winter months. I am going to try year-round gardening with leafy greens and keep my diy grow light shelves up to see if I can get salad year round. Since grow lights mimic natural sunlight, hopefully my grow light stand will have some vegetables on it all year round!
For my grow lights, I have accumulated them multiple ways. I bought my first one off of amazon over 5 years ago and it’s still going strong. All the rest of mine have been found through garage sales for insanely cheap. For some reason, lots of people like to get rid of shop lights. So, if you are on a budget and have time, do some thrifty shopping to find your materials. You might need to replace the lights but try to buy the best double ended grow lights you can afford.
DIY Grow Light Shelves
Without further ado, grab your sturdy shelving unit and full-spectrum fluorescents and let’s get to work!
Set up the shelving unit according to the manufacturer’s directions. Open shelves are typically very easy to set up. Try to find a place near a power supply, away from any drafts, and possibly out of the way of any toddlers. (Ask me how I know.)
Place hooks into ceiling to hang up the lighting system for the top shelf. Depending on where the hooks need to be screwed into, you might be able to just screw the hook in by hand or you might need to drill a pilot hole first. Don’t worry, I have very much not a tool person and I figured this out. If your hook isn’t screwing in by hand, grab a power drill and place a screw on it. Drill the screw where you will be placing the hook and then take it out. Now your s-hook should screw in nicely by hand!

Drill the screw where you will be placing the hook and then take it out.
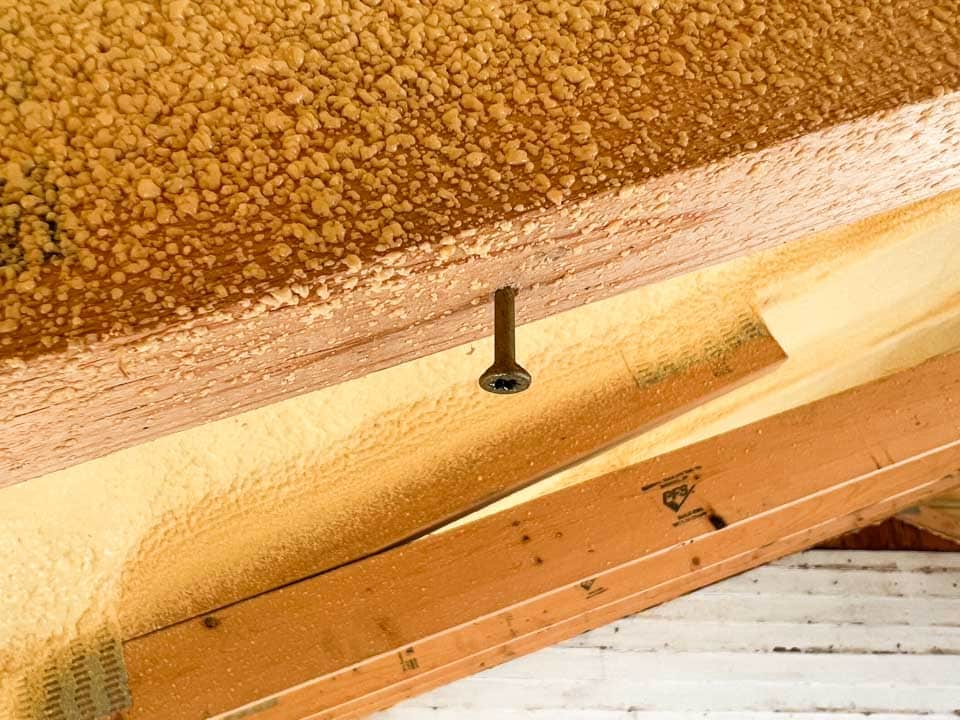
Now your hook should screw in nicely by hand!

Hang chains from the hooks to hook your light setup onto.
Next, place the light onto the chains. If your light fixture didn’t come with something to hook the artificial lights onto the chain with (or you lost the pieces), be frugal and use a paper clip. It works great!

Plug the indoor grow light system in and you have officially made your own grow light system! Congratulations!

Tips for Using Grow Lights
- Make sure you leave the grow lights on long enough. There are timers available to buy that can turn the light bulbs on and off for you. If they aren’t getting enough light, they won’t be strong and plant growth can suffer.
- Place the full spectrum lights above vegetable seedlings by 2-3 inches.
- Place a plastic mat under stand to protect the floor.
- To increase germination on seedlings, try placing heat mats under seed trays until they are ready for light.
Build My DIY Grow Light Shelves With Me Here:

FAQs:
Most shelving units allow room for 2 lights per shelf. If you only have one light, that is still going to work, you just may have to turn your plants every other day depending on if they get leggy or not.
Yes! Buying a premade one can cost $1,000 on up. Your cost will be split in half by doing it yourself. Plus, it’s customizable as well to diy.
Technically yes. you can use any LED lights as a grow light. However, your seedlings will not be as strong because you need a full color spectrum light for the strongest plants.
Save This Post for Later:
This post may contain affiliate links which I would receive a small commission at no additional cost to you. Please read disclaimer and privacy policy for full disclosure.
